

Refinishing your timber floors as a DIY project can be a rewarding experience. Not only could it save you money, but there’s something incredibly satisfying about seeing your own handiwork transform a room.
However, before you dive in, it’s important to understand the challenges that come with floor sanding and polishing.
DIY floor refinishing requires careful planning, patience, and a willingness to learn on the job. From managing dust and noise to handling professional-grade equipment, there’s more to it than meets the eye.
Knowing the ins and outs beforehand can help you decide whether to take it on yourself or call in the pros. Read on to learn more, or give us a call at (02) 8425 8999 for a no-obligation quote.
Steps and Key Considerations
DIY wood floor finish projects come with one huge drawcard: saving money. On paper, doing it yourself seems like the cheaper option. There are endless tutorials on YouTube, hardware stores stocked with rental sanders, and a plethora of floor finishes and stains to choose from.
Plus, you get that hands-on experience and the satisfaction of seeing your hard work transform the room. Anyone with enough time and inclination can do it.
However, while it might seem like all you need to do is just rent a sander, grab some varnish, and have at it, there are some hidden costs and factors that you must consider. Such as:
- Time commitment: While professionals can complete the job in a couple of days, DIY projects typically take longer as you learn and perfect each step. Plan for adequate time to complete the project properly.
- Physical demands: Floor sanding requires sustained physical effort, especially when using rental equipment. Be prepared for a workout!
- Learning curve: While there’s a learning curve involved, many homeowners successfully refinish their floors. The key is proper preparation and patience.
- Safety considerations: You’ll need proper ventilation and safety equipment to handle dust and noise. Wood dust is flammable and can affect respiratory health, so proper containment is essential.
If you’re ready to tackle the project yourself, here’s how to approach it:

Preparation
The first step to success is thorough preparation. Start by completely clearing the room—furniture, rugs, and anything else on the floor needs to go. This gives you an open workspace and ensures you won’t accidentally damage anything during the process.
Even items in adjacent rooms should be covered, as sanding dust has an uncanny ability to travel. Take photos of your floor before you begin, paying special attention to any damaged areas. This will help you track your progress and ensure you don’t miss any spots.
Before any sanding begins, conduct a thorough inspection of your floor. Look for protruding nails, which should be countersunk below the surface, and identify any boards that need repair or replacement. Fill smaller holes and cracks with wood filler that matches your floor color.
For larger repairs, you may need to replace entire boards—this should be done before sanding begins. Seal off all doorways and vents with plastic sheeting and painter’s tape to contain dust, and set up fans in windows to exhaust dust-filled air outside.
Equipment Setup: Getting Your Tools Ready
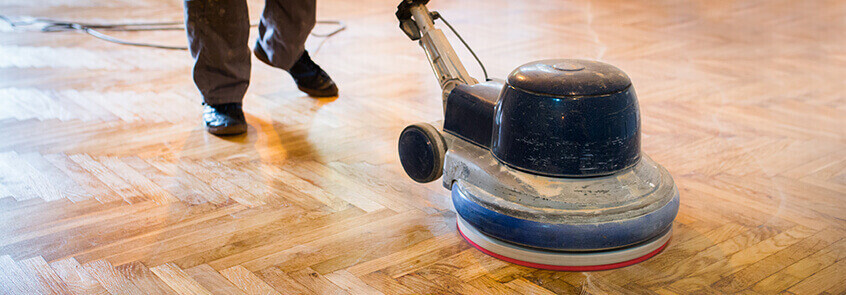
Your primary tool will be a drum sander, which handles the main floor area. When renting one, ask for a demonstration and practice on a scrap piece of wood if possible. The drum sander is powerful and can damage your floor if not handled correctly.
You’ll also need an edge sander for corners and edges where the drum sander can’t reach. Both machines should come with detailed instructions—read them carefully.
Take time to organize your sandpaper in the order you’ll use it. Start with a coarse grit (36-40) for damaged floors or 60 grit for floors in better condition. Plan to progress through medium (80-100) and fine grits (120-150) for the smoothest finish.
Before starting, test your sander in an inconspicuous area or closet to get a feel for the machine and ensure you’ve chosen the right initial grit. Set up your vacuum system and ensure you have enough extension cords to reach the entire room without creating tripping hazards.
Sanding Process
Begin sanding with the drum sander, working in the direction of the wood grain. Start at one end of the room and move forward in overlapping passes, keeping the sander moving constantly.
Never let it sit in one spot while running, as this can create dips in your floor. Move at a steady pace—about the speed you’d walk a dog. The first pass with coarse-grit paper will remove the old finish and level the floor.
After completing the main floor area with one grit, use the edge sander to do the perimeter of the room. The edge sander is circular, so you’ll need to feather the edges to blend with the main floor area.
Between grits, vacuum thoroughly and wipe the floor with a tack cloth to remove all dust. Inspect your work under good lighting—a flashlight held at an angle will help highlight any remaining rough spots or scratches that need attention.
Repeat the process with progressively finer grits until your floor feels smooth to the touch.
Finishing
Before applying any finish, ensure the floor is completely dust-free. Vacuum multiple times, then use a tack cloth to wipe down the entire surface. Any dust left behind will become permanently visible in the finish.
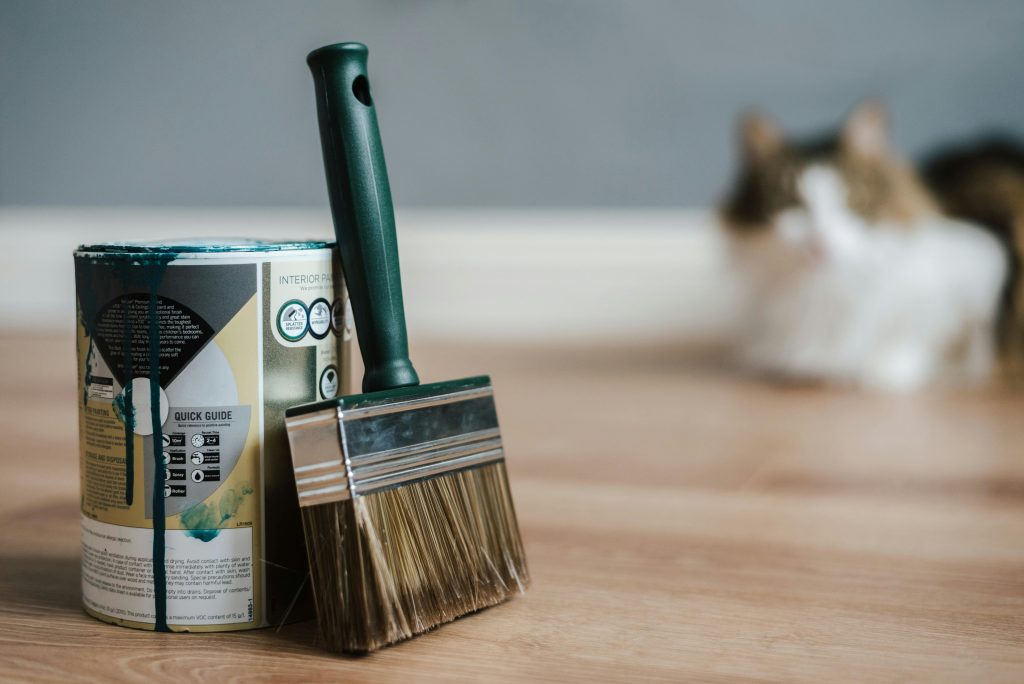
Choose your finish carefully—water-based polyurethanes dry quickly and have less odor, while oil-based finishes are more durable but require longer drying times and better ventilation.
Apply the first coat of finish using a lamb’s wool applicator or high-quality brush, working in the direction of the grain in long, smooth strokes. Start in the corner farthest from the door and work your way toward the exit.
Allow this coat to dry completely according to the manufacturer’s instructions—rushing this step can ruin your entire project.
Once dry, lightly sand with fine-grit paper (220) or a buffing pad, clean thoroughly, and apply a second coat. Most floors benefit from three coats of finish, with light sanding between each coat.
Essential Equipment and Materials: Your Complete Checklist
Having the right tools and materials on hand will save you time and frustration. Here’s what you’ll need:
- Drum sander with various grits of paper (rental)
- Edge sander with matching grits (rental)
- Random orbital sander for detailed work
- Industrial vacuum with HEPA filter
- Floor buffer for between-coat sanding (optional)
- Personal protective equipment:
- N95 or better respirator
- Safety goggles
- Ear protection
- Knee pads
- Work gloves
Your materials checklist should include:
- Sandpaper in multiple grits (36, 60, 80, 100, 120, 150 for sanding; 220 for between coats)
- Wood filler and putty knife
- Replacement boards if needed
- Floor finish (water or oil-based polyurethane)
- Application tools (lamb’s wool applicator, high-quality brushes)
- Tack cloths and microfiber cleaning cloths
- Plastic sheeting and painter’s tape
- Extension cords
- Trash bags for dust collection
- Basic tools (hammer, nail set, pry bar, utility knife)
Remember to read all manufacturer instructions carefully and test products in an inconspicuous area first. Proper preparation and patience are your best tools for achieving professional-quality results in your DIY floor refinishing project.
Professional Services: When to Consider Them
Professionals bring more than just muscle to the table. They bring years of expertise and the kind of equipment that delivers results you simply can’t achieve with rented gear.
From precision sanders that can handle delicate edges and corners to dust extraction systems that keep your home clean and safe, hiring a pro means getting the job done right the first time, without any of the hassle or guesswork.
If you’re facing a challenging floor, don’t leave it to chance. When in doubt, it’s always worth calling in the professionals to ensure your timber floors look their absolute best, whether you’re restoring them or installing a brand-new finish.
Here are some instances when calling in the big guns may be a smart move.
You’re Working With a Large Area (Over 50m²)
If you’re working in a big space, the sheer scale of the job can become overwhelming. DIY floor sanding over a large area is not just physically exhausting—it’s a technical challenge.
Maintaining even pressure and consistency across hundreds of square metres is tough, especially with rental sanders that might not be up to the task. Commercial-grade equipment is designed to handle big jobs like these with precision, ensuring no uneven patches, missed spots, or sander marks.
Your Floor Has Extensive Damage
Dealing with deep scratches, water damage, or warped boards? That’s where things get tricky. DIY sanding can handle surface-level imperfections, but when your floor has sustained serious damage, it takes a trained eye and the right tools to bring it back to life.
Over-sanding can make things worse, and if you’re not careful, you could end up thinning the boards too much or even gouging the wood. Professionals know exactly how to approach different types of damage and will adjust their sanding techniques accordingly.
You Have Premium or Exotic Wood Flooring
If you’ve invested in premium timber or a high-end custom finish, you don’t want to risk damaging that with an amateur attempt. Certain exotic timbers or bespoke finishes require specialised knowledge and care.
Professionals have access to top-of-the-line finishing products and can ensure a flawless, durable result. They also know how to handle complex staining techniques or achieve that perfect satin, matte, or high-gloss sheen that can make or break the look of a luxury floor.
DIY vs Hiring a Pro
There’s a reason why so many people choose to hire professionals for floor refinishing, even after exploring DIY options. Professionals understand how different types of wood respond to various stains, oils, and sealants, and can help you choose the right one for your specific flooring.
And while upfront costs may seem higher, hiring a professional often saves you money in the long run. There are no hidden costs from botched jobs, no wasted materials from trial and error, and no spending extra time on a project that drags on far longer than anticipated.
We’re Happy to Help!
At Abacus Flooring, we have years of experience dealing with all kinds of timber floors, from heritage homes to modern apartments. We know how to sand your floors evenly, remove any deep scratches or damage, and apply a flawless finish that will last.
Our team uses industrial-grade sanding machines, which not only do a better job but also work faster, saving you time and effort. Whether you’re dealing with worn-out floorboards that need a complete overhaul or you simply want to refresh the look of your home, we offer a range of floor sanding and polishing services tailored to your needs.
Contact our team in Sydney by email, or phone (02) 8425 8999 for an obligation free quote today.
